
CleanGeeker for Mac
CleanGeeker for Mac can clean up junk files on Mac and act as the best Mac uninstaller while removing the corresponding files. Get your computer’s speed and performance improved with CleanGeeker for Mac.
This smart application removes unwanted items from Mac and makes it run faster than ever. It speedily trawls through files and folders to remove system junk files, cache logs, app caches, iTunes junk files and leftover items.
With that, it is extremely easy to use for new as advanced users so they can enjoy Mac at its best pace. It also removes and removes duplicate files hidden in the corners of the system.
Product Highlights & Benefits:
-
Remove unwanted apps and its temporary files
This app uninstaller makes sure that not only the undesired application is deleted from Mac but also its associated files and logs are also gone in one single click.
-
Scans the system deeply
CleanGeeker for Mac uses a RAW searching algorithm to scan out existing and hidden junk files, cache files, mail attachments, browser junk files, and more to remove them completely.
-
Real-time capture of battery state
Since this best Mac uninstaller is also very intelligent in nature, it captures real time battery state, CPU usage, and memory usage.
-
Rigged with a smart security system
According to CleanGeeker, many tools cannot figure out which junk files are useful but this tool is safe and smart enough to detect the right junk files.
How To Use CleanGeeker For Mac
It is a very simple and straightforward method to download and install CleanGeeker in your system. Click the download button below and understand the process by scrolling through.
Working Process –
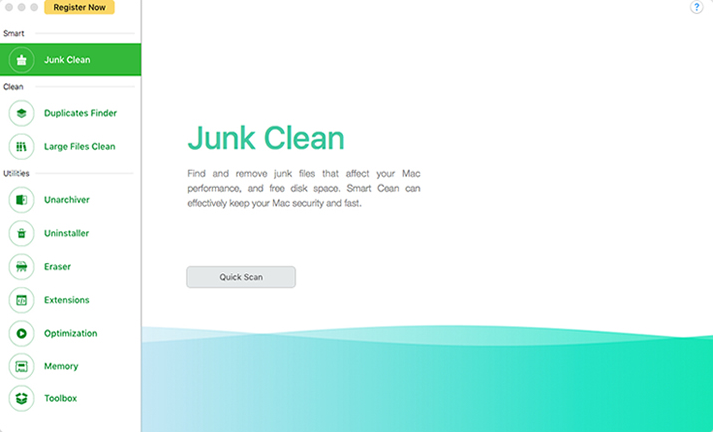
Step 1: Launch the tool on your system.
Step 2: Select ‘Junk Clean’ under ‘Smart’ section. Click Quick Scan and choose to delete the junk.
Step 3: Under ‘Clean’ section, click ‘Duplicate finder’ or ‘Large files clean’ and choose Quick Scan. Delete the unwanted junk found.
Step 4: Under ‘Utilities’ section, choose the option you wish to go ahead. For example, click ‘Uninstaller’ and the scanning will take place. As soon as the list of apps appears, click the unwanted app and choose to uninstall.
Other options like Unarchiver, Eraser, Extensions, Optimization, Memory and Toolbox can be selected as per the requirement.